Setup UI for docs & lineage
This page covers the setup steps necessary to view your dbt documentation and lineage in the SaaS UI. The steps below ship your manifest.json and catalog.json projects to SaaS UI in order to visualize information like dbt model/column descriptions and column lineage.
Please note that this lineage and documentation in UI functionality is not yet supported with dbt 1.8
If you want to re-create any existing dbt core integration using Connections, kindly delete the existing integration first and then create a fresh connection.
Step 1: Create a dbt Core Connection
-
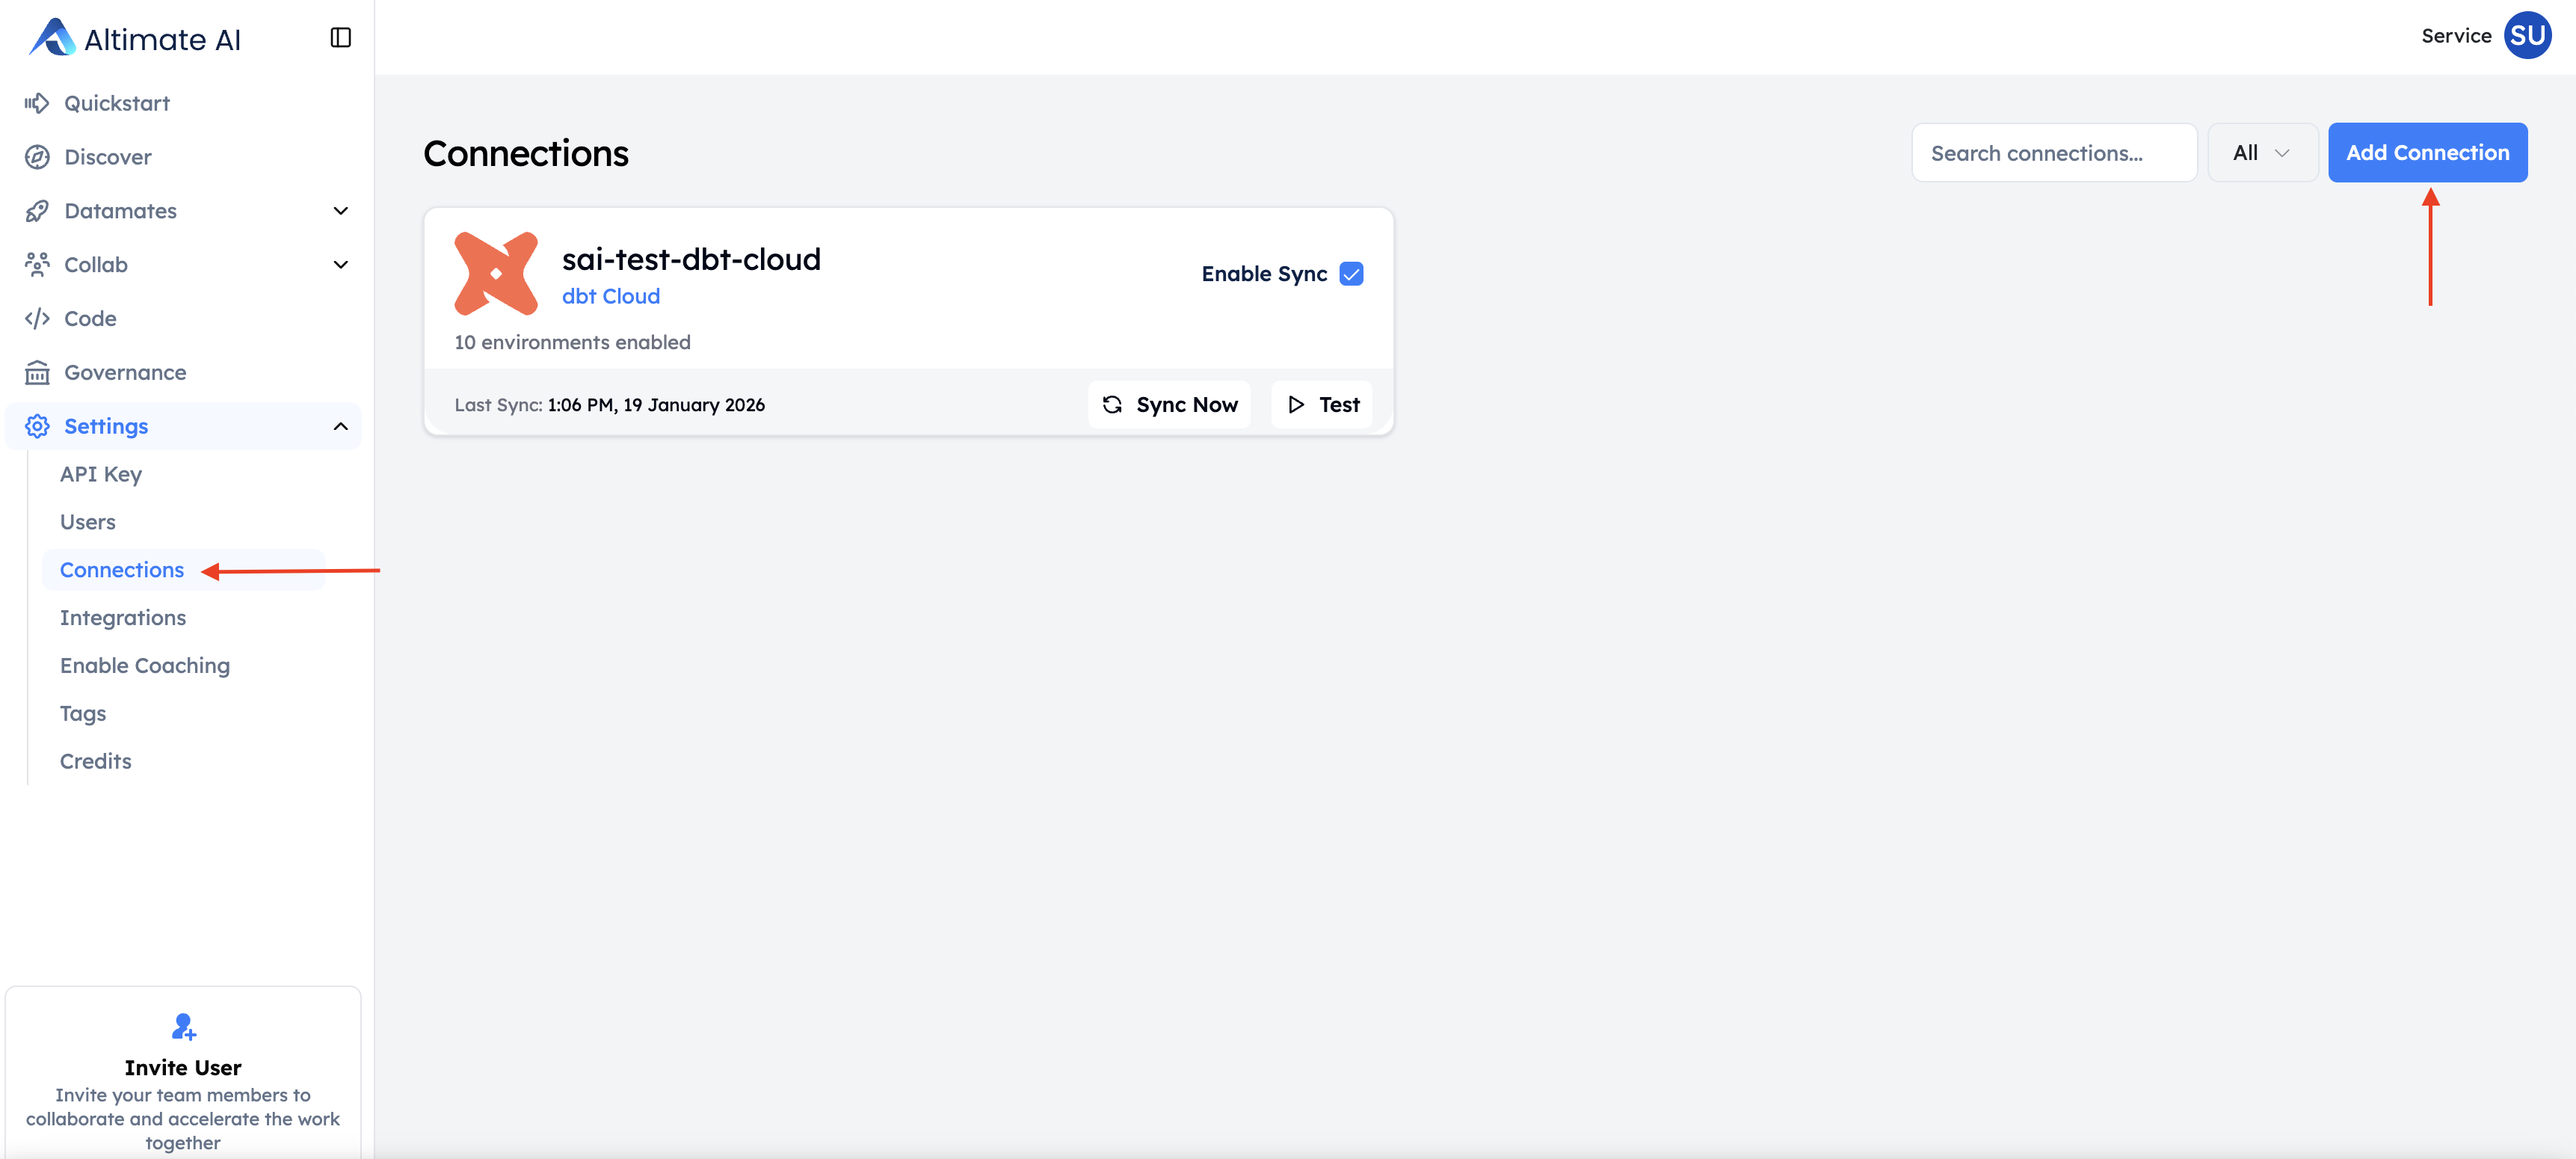
Navigate to Settings -> Connections and click Create new connection
-
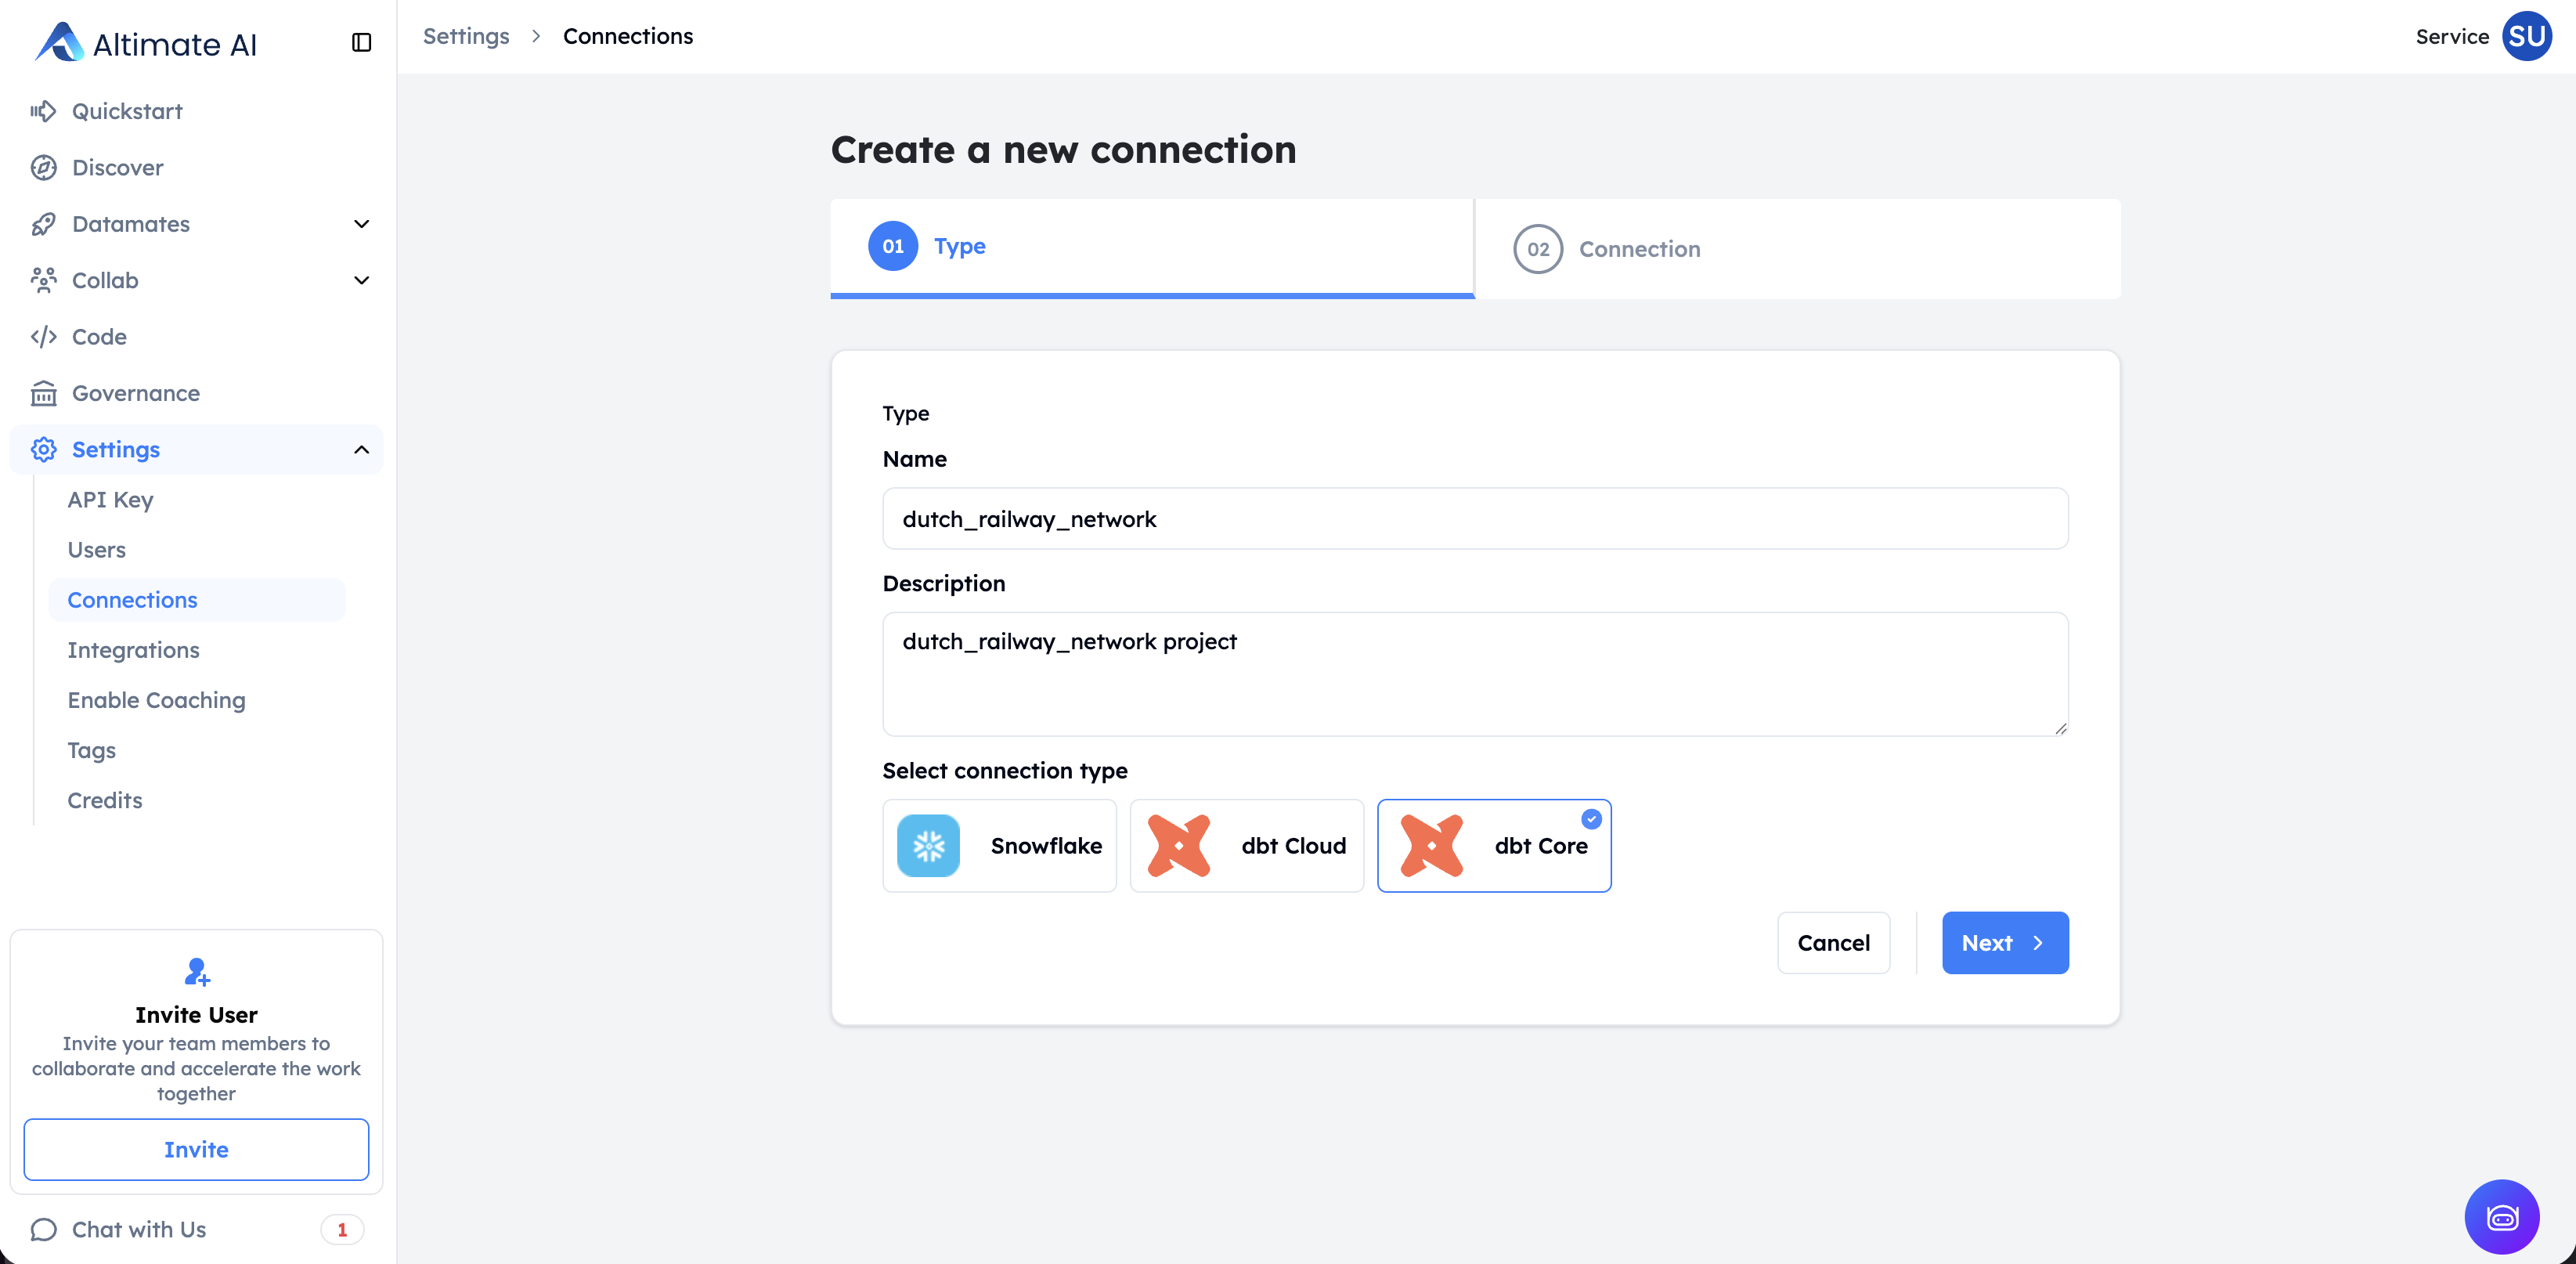
Select dbt Core as the connection type & provide the required connection name & description details
-
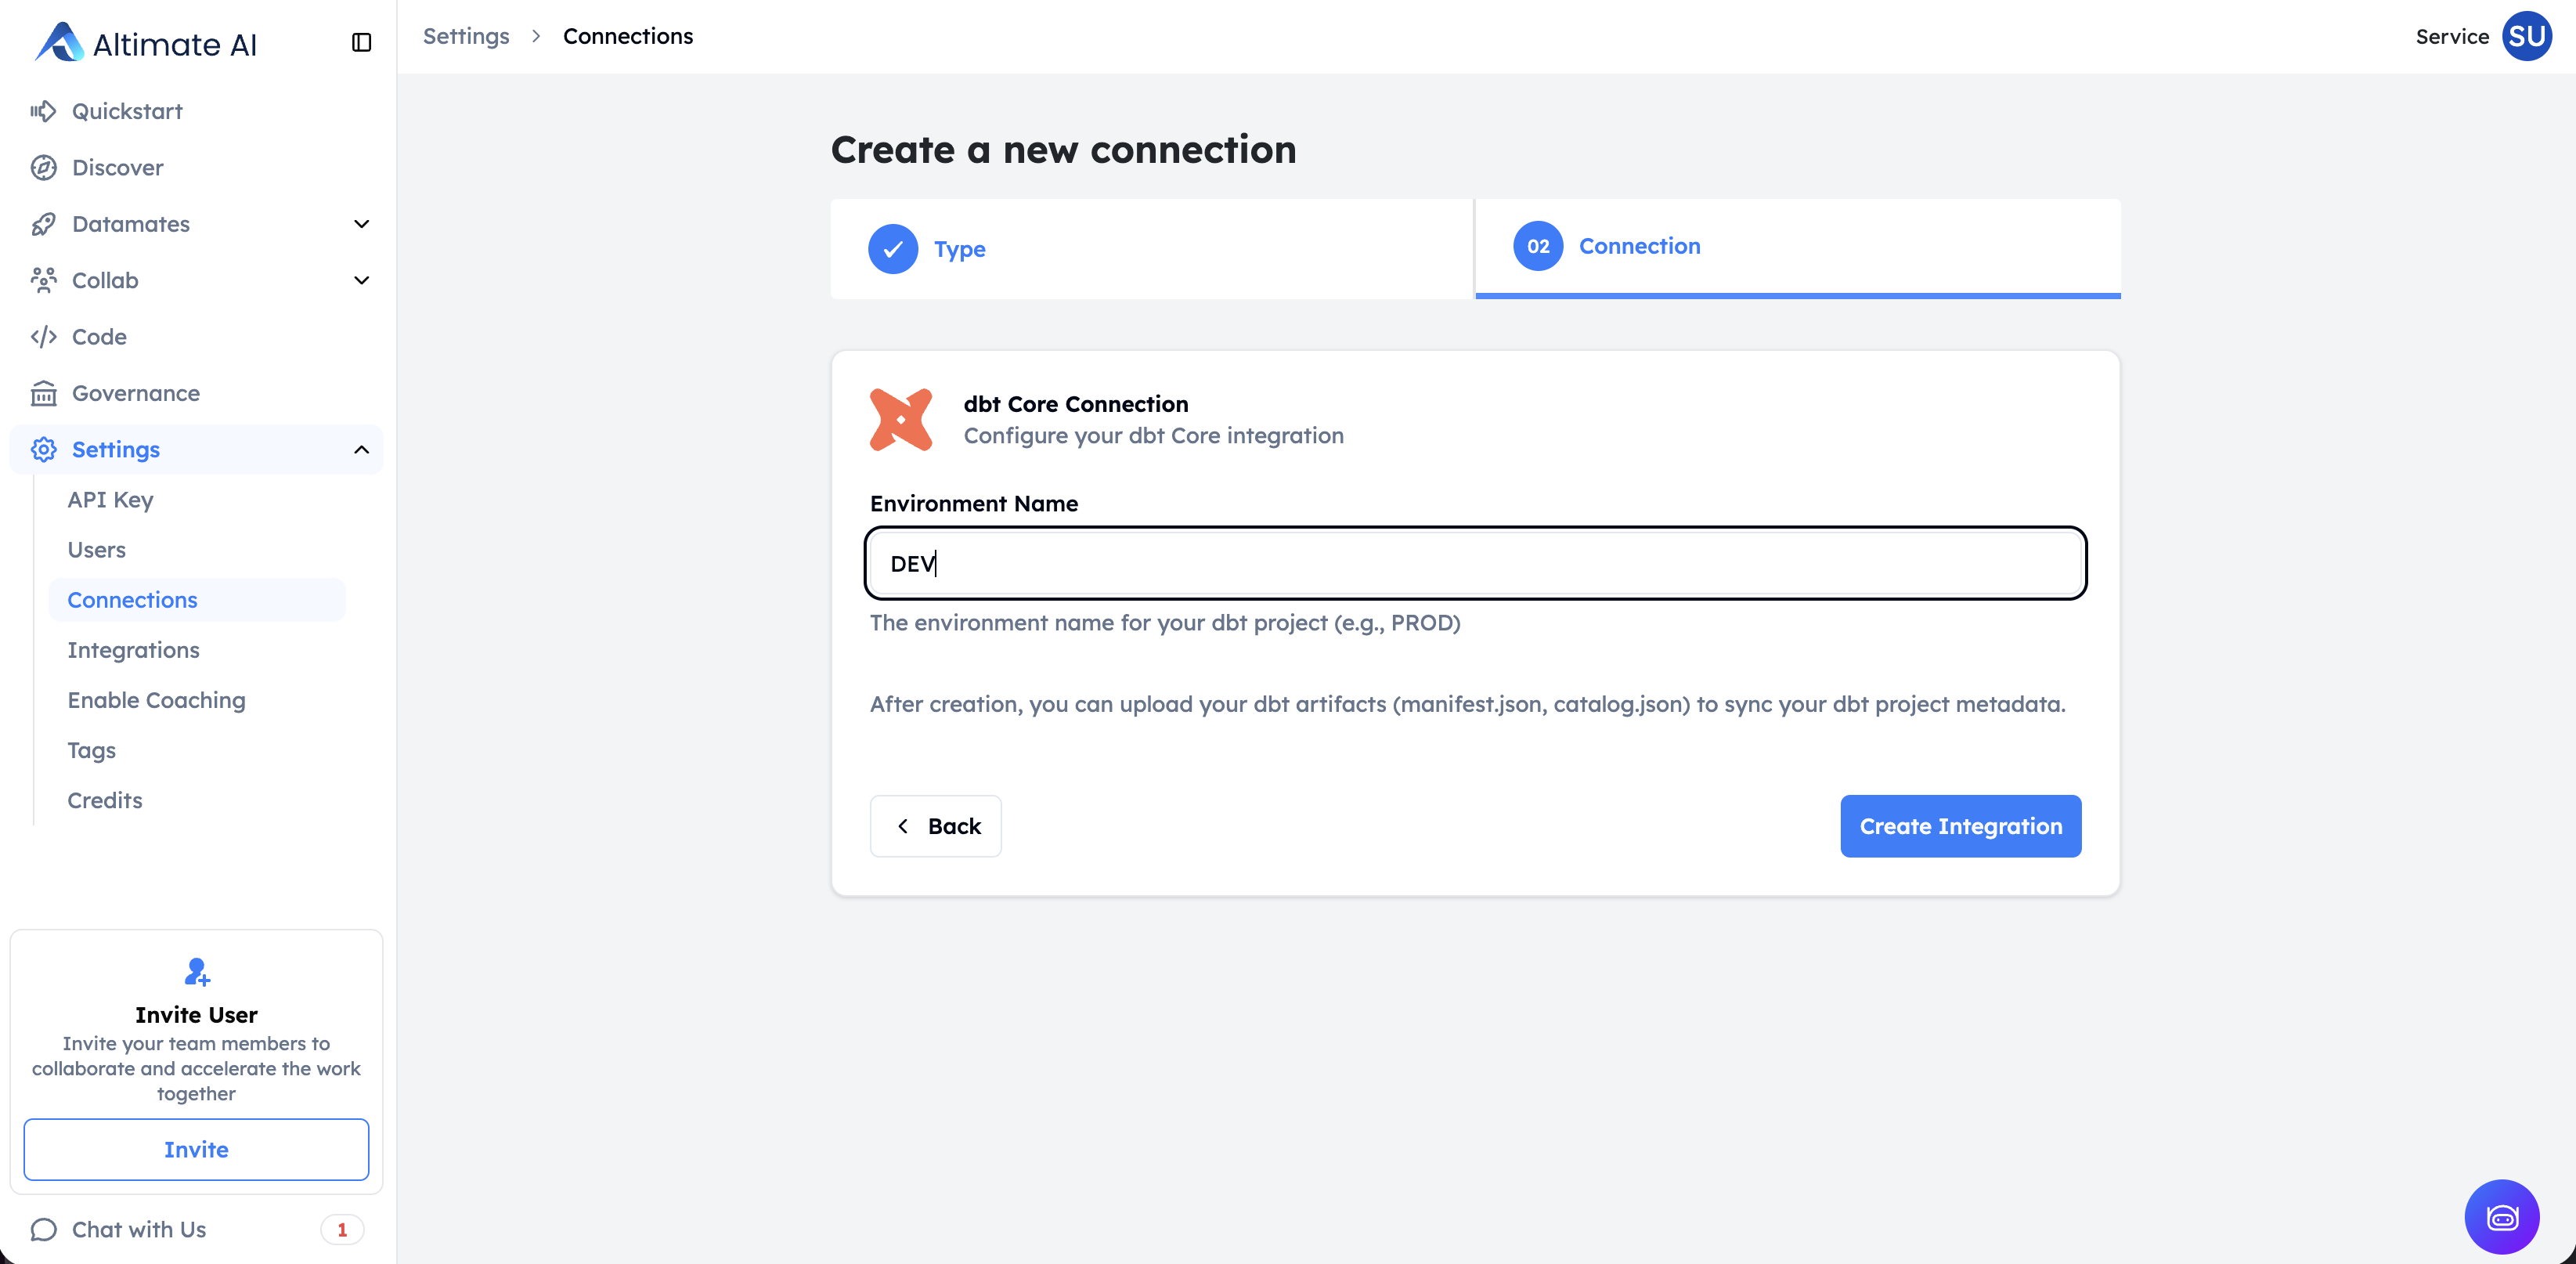
Provide Environment Name & Click Create Connection to create the dbt Core connection
| Field | Description |
|---|---|
| Connection name | Unique connection name, this can be mapped to your dbt Project |
| Connection description | A brief description of the connection (e.g., "Production dbt Core project for analytics") |
| Environment name | Environment name can be based on which environment that you are going to upload manifest.json and catalog.json files from. For now, just add the value as "prod" for your production environments. |
Step 2: Install the open-source DataPilot CLI
The next step is to install the latest version of DataPilot CLI. It will be used to upload manifest and catalog files to the SaaS instance. Please run the following command to install the latest version of the DataPilot CLI.
Here's the link to the repo: https://github.com/AltimateAI/datapilot-cli
Step 3: Execute the command for uploading the manifest and catalog files
Go to Settings -> Connections page and click on the dbt core connection name for the connection created. Copy the command for uploading files in the overlay screen on the side.
manifest and catalog files don't contain any information about your data. It's all metadata about your environment. Please feel free to check our security page for more info on how we protect your metadata.
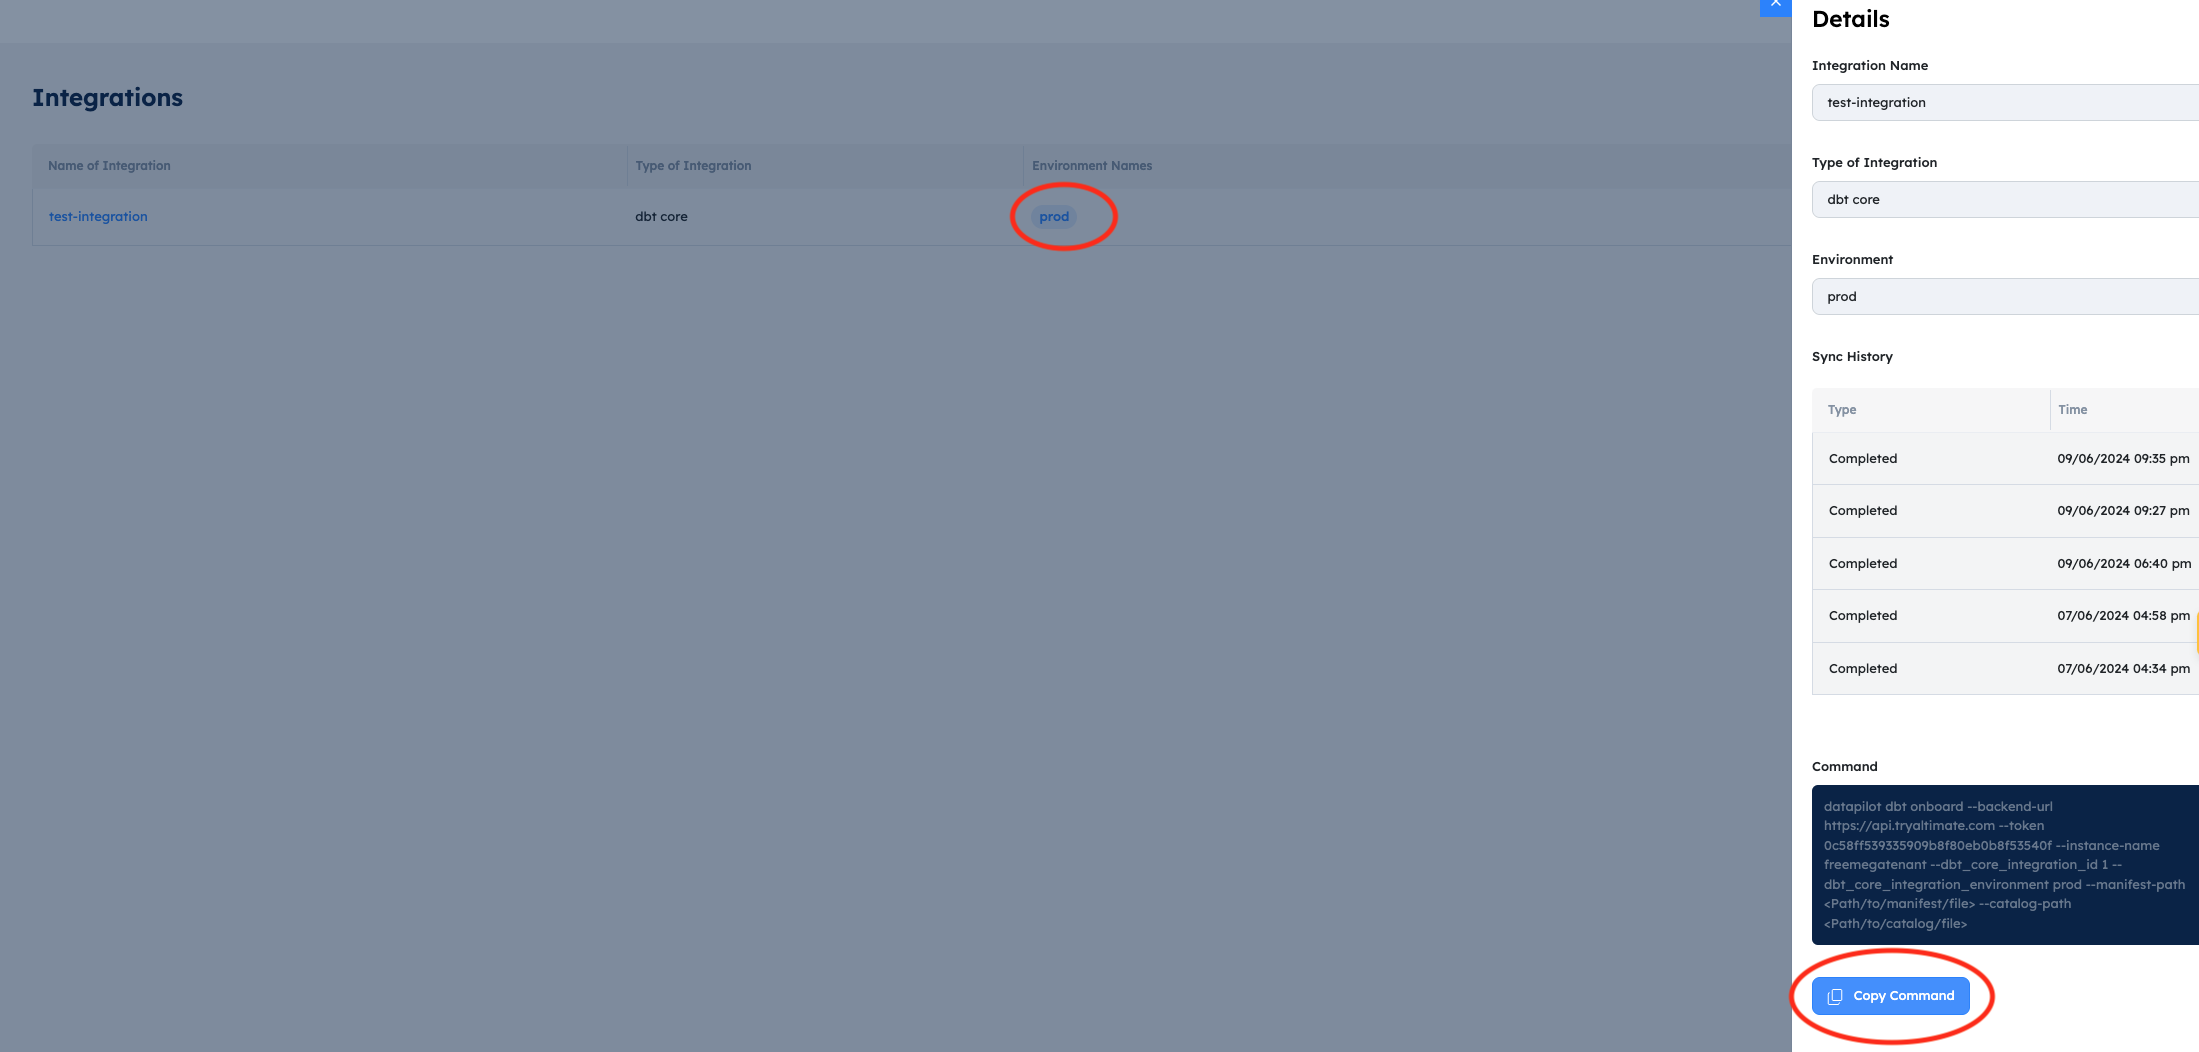
You need to update the following placeholders in the copied command -
| Placeholder | Description | Example |
|---|---|---|
| Path/to/manifest/file | This is path to your manifest file in the project directory. It's usually stored in the 'target' directory in your dbt project. | ./target/manifest.json |
| Path/to/catalog/file | This is the path to your catalog file in the project directory. It's usually stored in the 'target' directory in your dbt project. | ./target/catalog.json |
| Path/to/run-results/file | Path to your run results file in the project directory | ./target/run_results.json |
| Path/to/semantic-manifest/file | Path to your semantic manifest file in the project directory | ./target/semantic_manifest.json |
| Path/to/sources/file | Path to your sources file in the project directory | ./target/sources.json |
In addition to the required manifest.json and catalog.json, we now support uploading additional artifacts — run_results.json, semantic_manifest.json, and sources.json — for richer insights. These are optional but recommended for complete visibility into your dbt project.
If you are missing manifest.json or catalog.json files in the target directory, please run the dbt build and dbt docs generate commands. Also, you can add steps to upload the manifest and catalog files command in your dbt pipelines. That way, you will always have up-to-date documentation and lineage in UI without any manual steps.
Here's the sample output after running the command and successfully uploading your files.
(.venv) pradnesh@pradneshs-MacBook-Air jaffle_shop % datapilot dbt onboard --backend-url https://api.tryaltimate.com --token 00x0x0x0x0x0x0 --instance-name freemegatenant --dbt_core_integration_id 1 --dbt_core_integration_environment prod --manifest-path ./target/manifest.json --catalog-path ./target/catalog.json
Manifest onboarded successfully!
Catalog onboarded successfully!
Manifest and catalog ingestion has started. You can check the status at https://freemegatenant.demo.tryaltimate.com/settings/integrations/1/prod
It takes a few minutes to upload the files and sync that info with the rest of the UI. You can check the status of the upload by going to the link provided in the command output.
Automating with CI/CD Pipelines
To ensure your dbt documentation and lineage in the UI stays up-to-date automatically, we strongly recommend integrating the manifest and catalog upload process into your CI/CD pipeline. This eliminates manual steps and ensures that any changes to your dbt project are immediately reflected in the SaaS UI.
Automatic Sync with dbt Cloud Connection
For dbt Cloud users, you can now set up automatic artifact syncing in the SaaS UI using the dbt Cloud API connection. This eliminates the need for manual file uploads or CLI commands.
Prerequisites: Create a dbt Cloud Service Token
Before setting up the connection, create a service token in dbt Cloud with Job Viewer permission. This grants read-only access to the Jobs API for fetching artifacts (manifest.json, catalog.json) from your dbt Cloud runs.
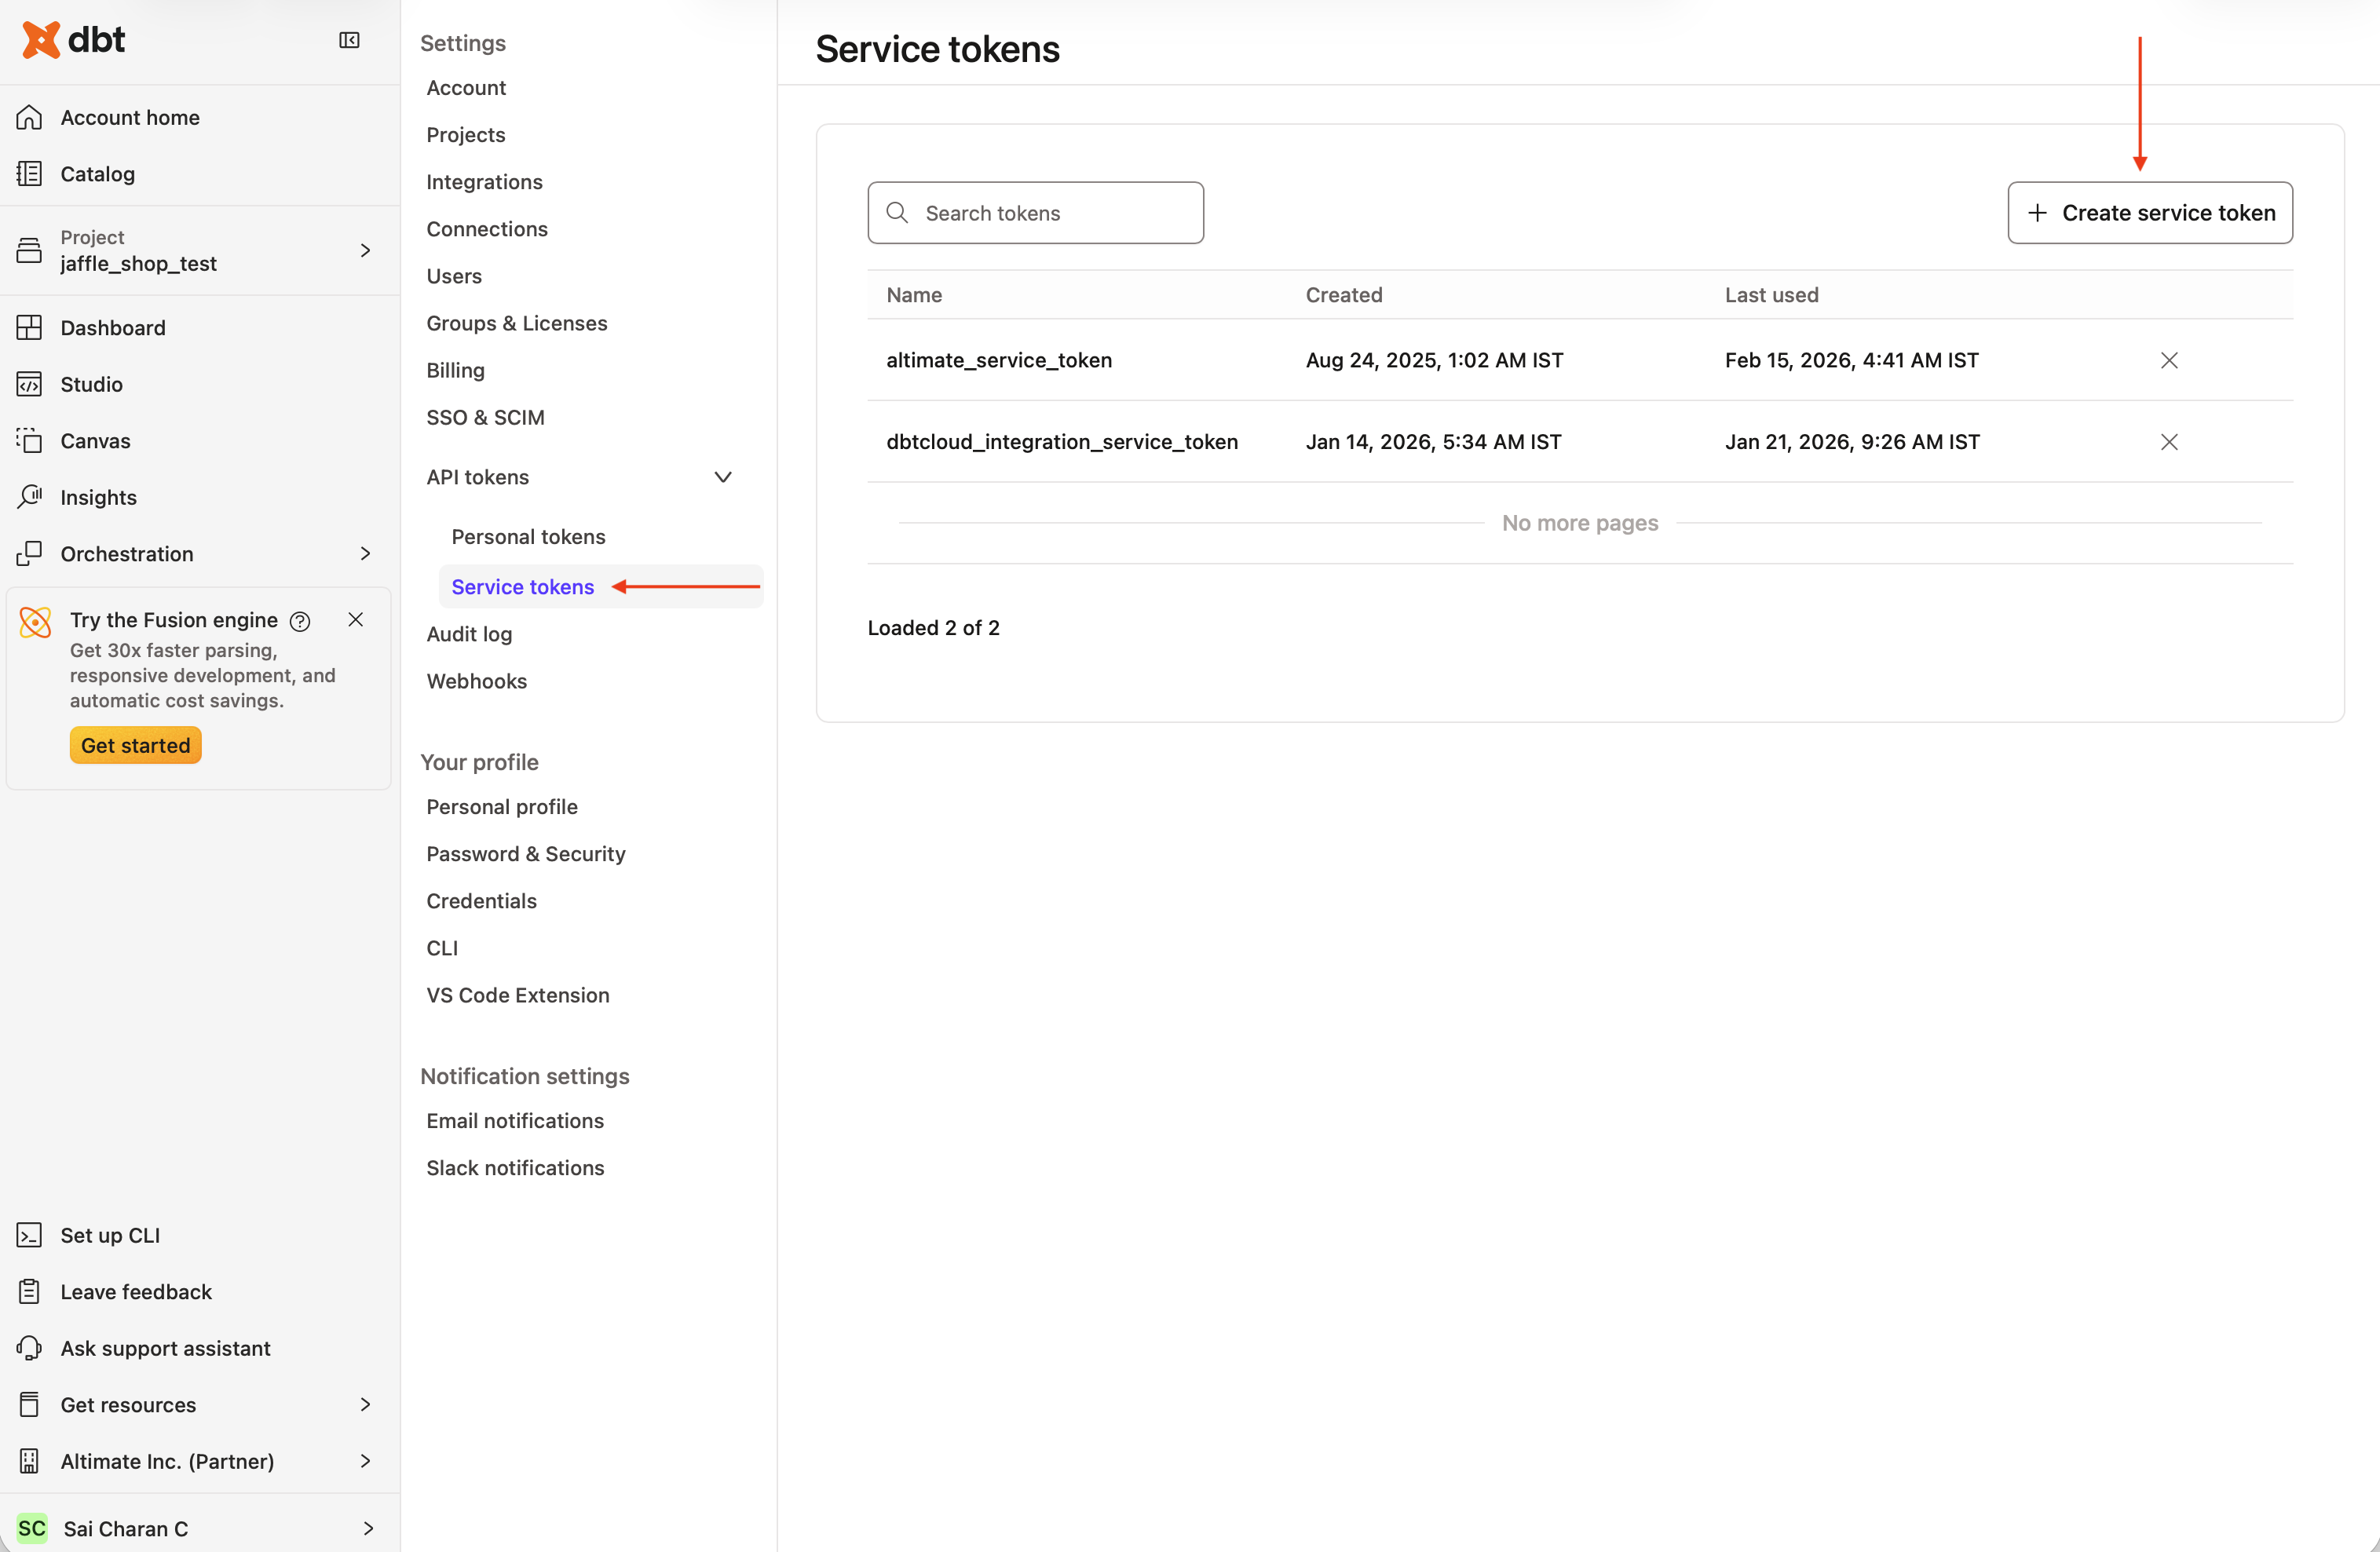
- Click your account name in the left menu and select Account settings
- Select Service Tokens from the left sidebar
- Click + New Token
- Enter a descriptive name (e.g., "Altimate Integration")
- Assign the Job Viewer permission and select the projects you want to sync
- Click Save
- Important: Copy and save the token immediately — you won't be able to view it again
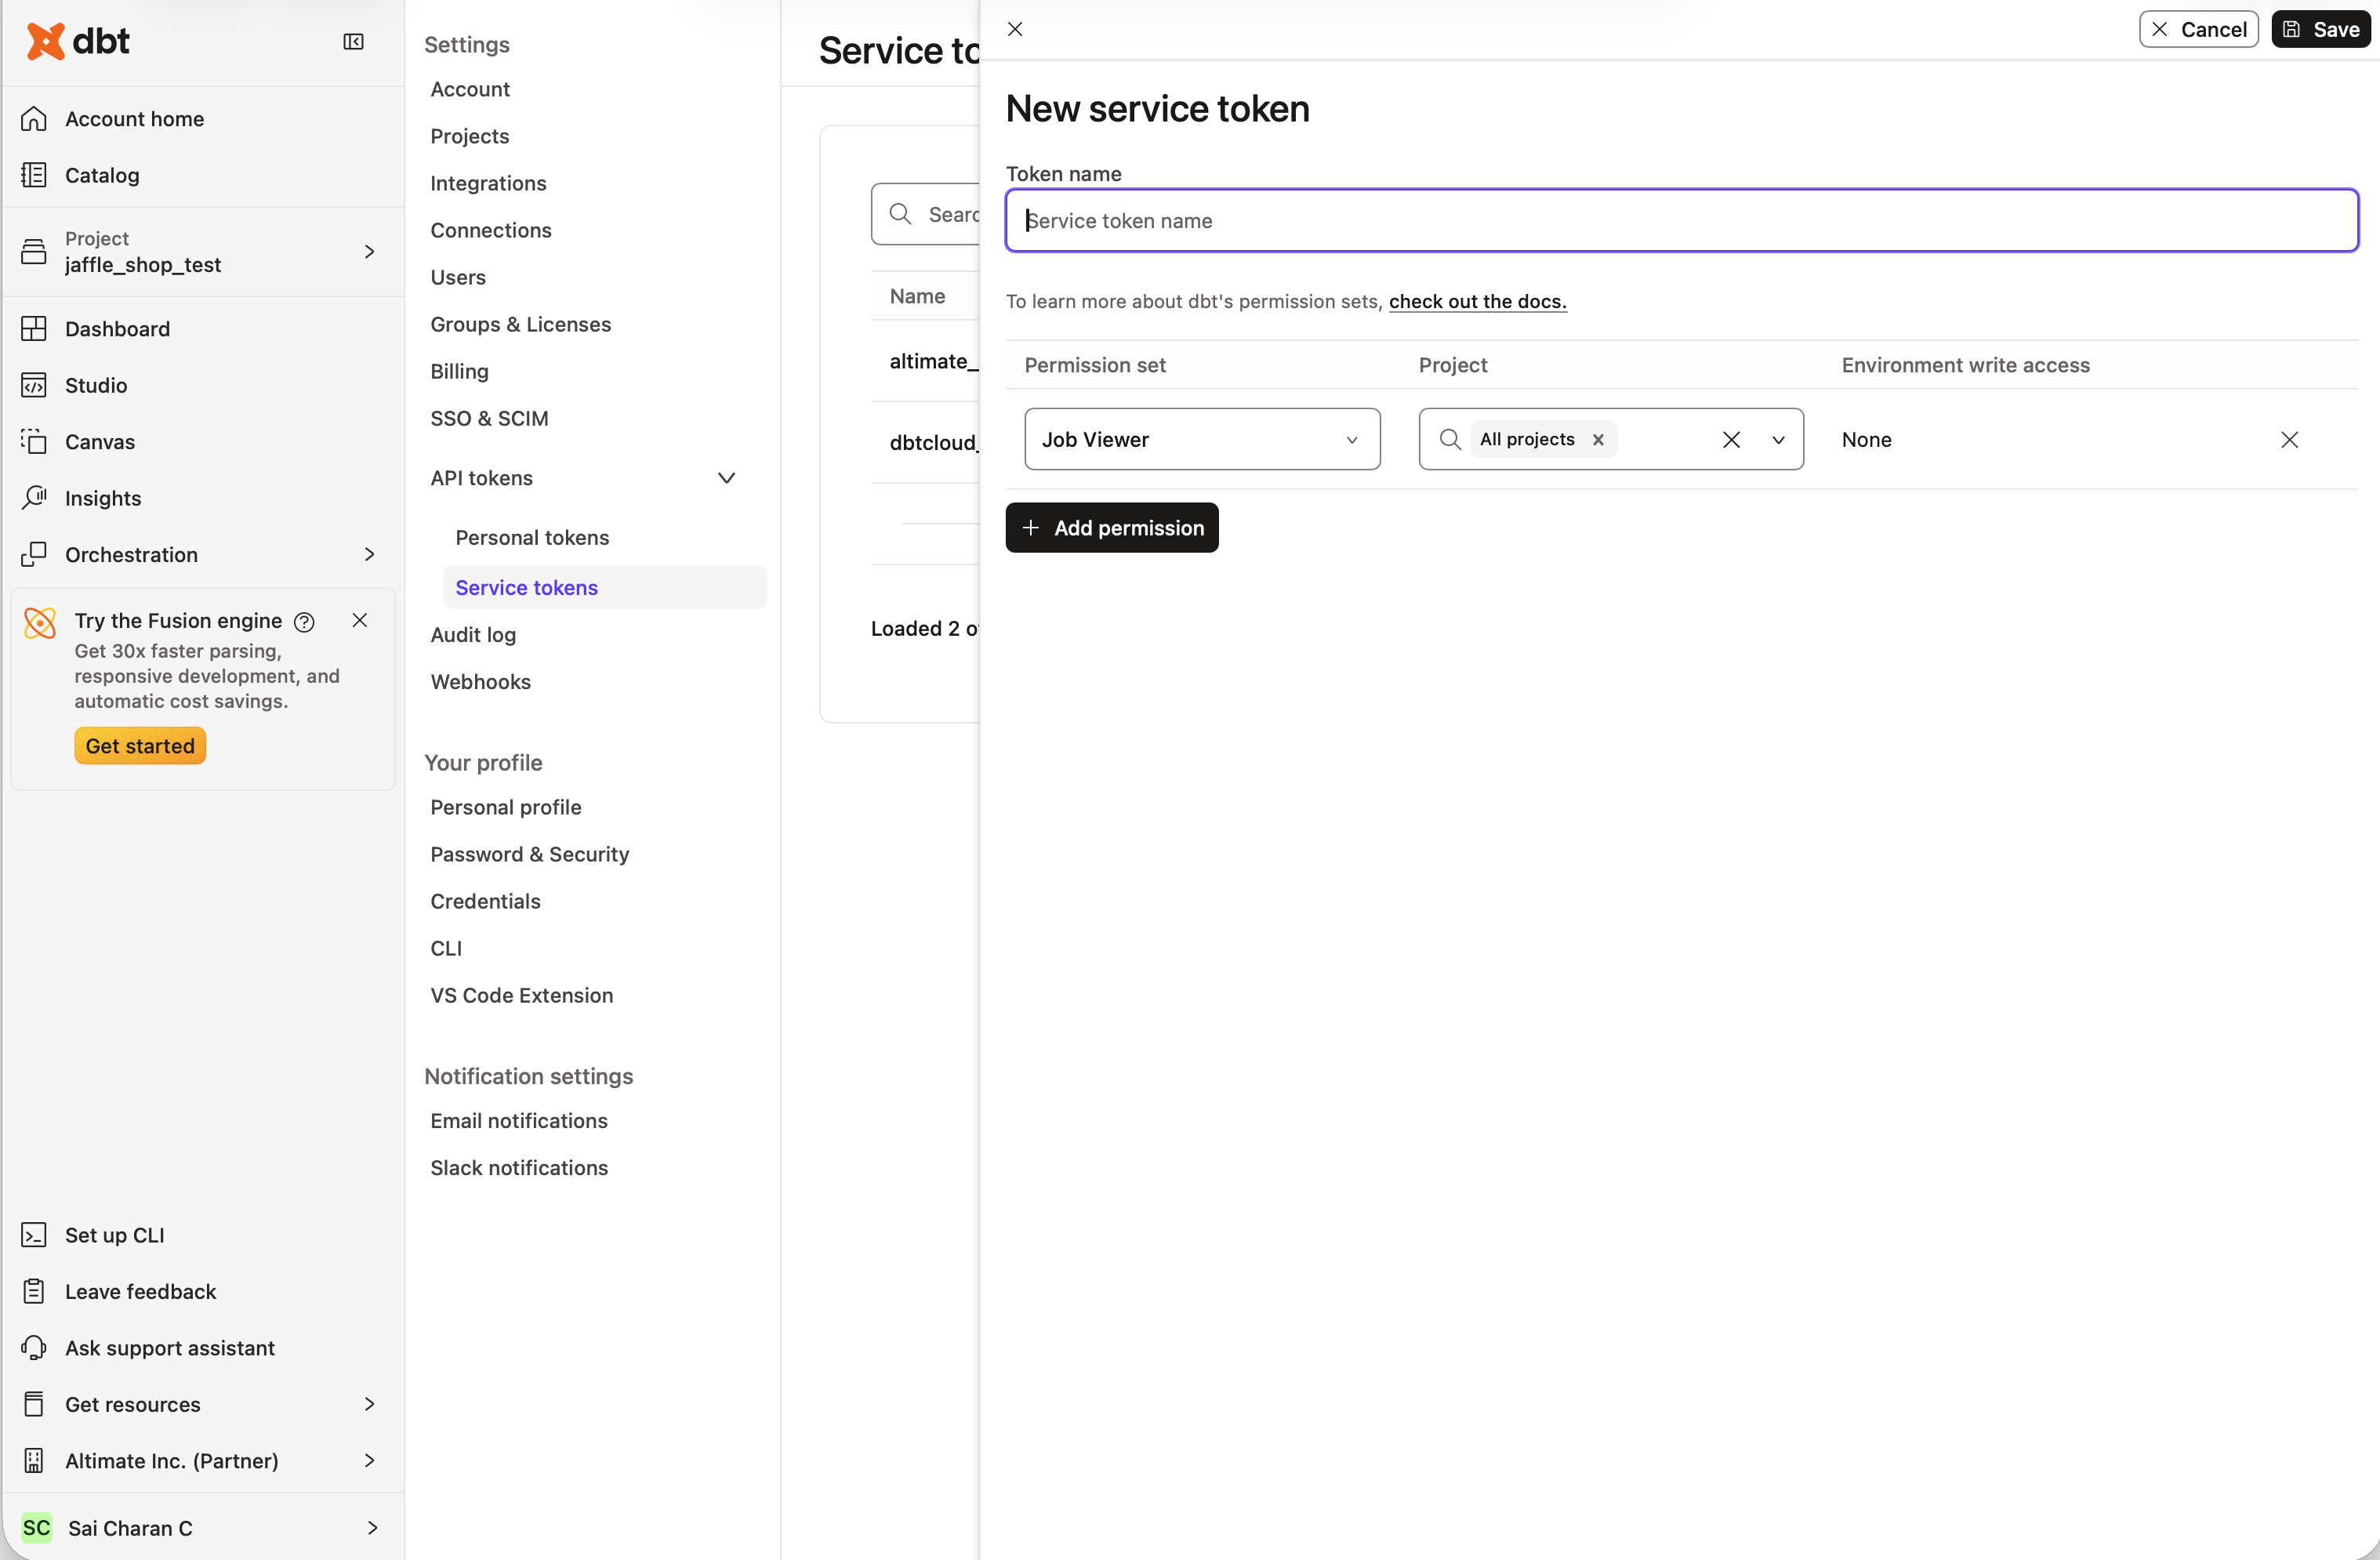
Note: Permission availability may vary by dbt Cloud plan. Refer to the dbt Cloud Service Tokens documentation for details.
Setup Steps
- Navigate to Settings -> Connections and click Create new connection
- Select dbt Cloud as the connection type
- Provide the required connection details:
- Service Account Token: Generate a new Service Token from dbt Cloud Account Settings (learn more)
- Account ID: Available at
https://cloud.getdbt.com/next/settings/accounts/{{account_id}} - Custom URL (optional): For custom dbt Cloud instances (defaults to
https://cloud.getdbt.com/api/v2/) - Click Test Connection to verify your setup
- Configure the sync schedule:
- Scheduled: Sync artifacts on a regular schedule. Select from Daily, Weekly, or Monthly frequency options and choose the time (UTC) when sync should occur (e.g., Daily at 12:00 AM UTC)
- Real-time: (Coming soon) Immediate sync when dbt Cloud runs complete
- Click Create Connection
After creation, your dbt Cloud projects and environments will be automatically discovered.
Automatic syncing keeps your documentation and lineage always up-to-date without manual intervention
The dbt cloud connection deletion has a processing delay of a few hours. If you need to recreate the same connection immediately, contact us.